SHUTT draws your Strava route straight over your photo as a mark: the shape of the run, with no map behind it. You can keep it as a plain line or pick one of 49 route styles from the map panel, from a chrome tube to a neon sign to a blue pearl at every kilometre. Five styles are Pro; the plain line and the other 44 are free.
This post covers what a mark is, how it compares with Strava's map share, what the styles do, and how to pick and tune one.
Map or mark: what is the difference?
A map answers "where did you run?". Streets, parks and coastline sit under the line, and anyone who knows the city can read your route. It is useful, and it takes up a lot of the picture.
A mark answers "what did the run look like?". Only the route's shape is drawn, over your own photo, at whatever size and position suits it. A loop round a park becomes a small closed shape; a point-to-point race becomes a gesture across the frame. Nobody needs a legend to read it.
At the time of writing (October 2026), Strava's sharing help page offers either a map image or one of your activity photos with stats added, for GPS activities only. Indoor and manual activities cannot be shared that way. That is the map side of the choice, and it is free.
SHUTT's route is the mark side. It is drawn from the same GPS track Strava stores, so it has the same limit: a treadmill run has no route to draw.
What kinds of route styles are there?
The rail opens on the plain line, then runs through the 49 styles in a curated order. They fall roughly into five families.
Lines. The quiet options: the route smoothed, made schematic like a transit diagram, or faceted into straight segments; a heavy ribbon; a hollow line with the photo showing through the middle; a line lifted off the photo with a soft shadow; one continuous hairline.
Metal and materials. Satin chrome, Mirror chrome, Silver plate, Anodised, Enamel, Blued steel, Porcelain, Carbon, Thread and Glass. These are rendered with light and depth, and several of them use your photo as part of the material: Mirror chrome reflects the picture, Glass bends it, and Emboss and Deboss push the photo itself up into a ridge or press the route into it.
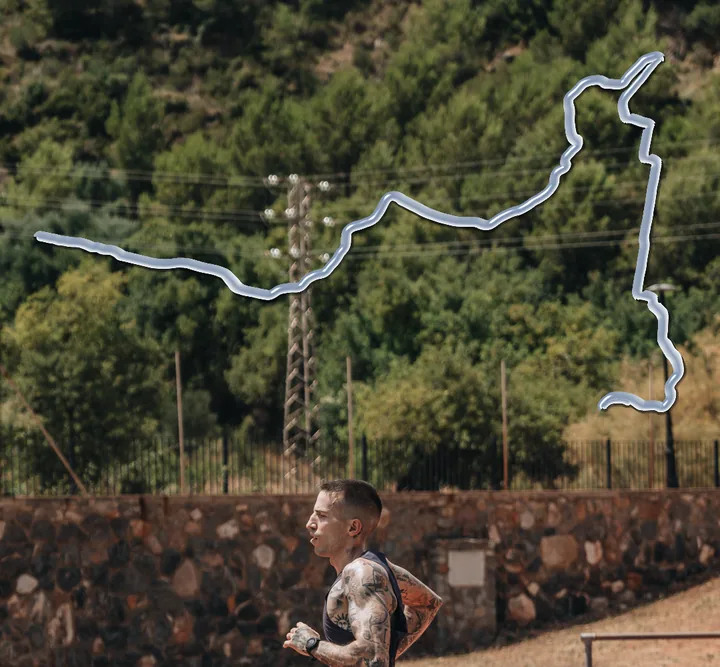
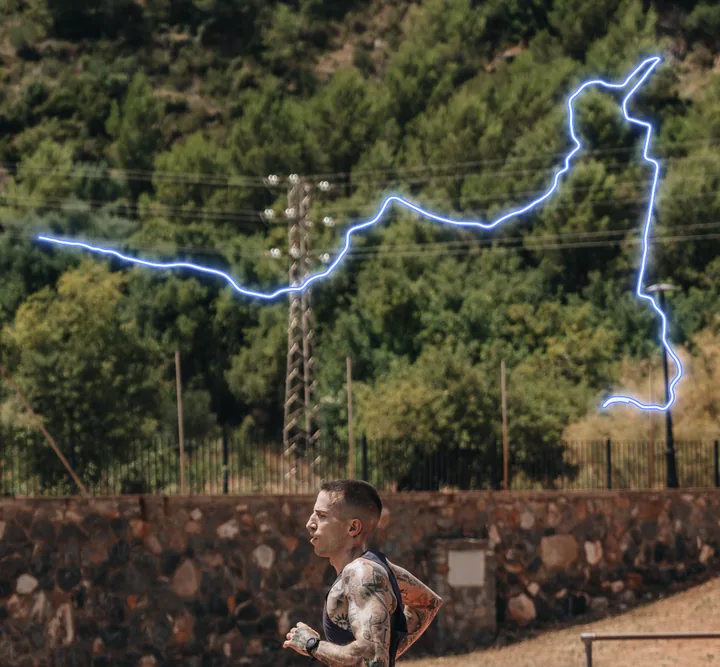
Light. The route as a light source rather than an object. Cast light brightens the photo around the line. Night light is a neon tube that gets brighter as the run goes on. Light painting looks like a long exposure of a torch carried round the course, brightest where you slowed. Shadow only draws no line at all, just the shadow it would cast. Sunprint turns the photo inside the line into a blue cyanotype.
Data. These carry numbers from the run, not just its shape:
- Numbered pearls: a pearl at every kilometre with its number inside.
- Metro: the route redrawn as a transit line with a station every kilometre.
- Split dashes and Split ticks: a mark per kilometre with real split times written along the route.
- Halftone: a dot screen where each dot's size follows your pace.
- Speed streaks and Waveform: the route reacts to how fast you were running.
- Depth and Altitude haze: the line coloured or misted by elevation.
- Arrival: the line starts as a white ghost and lands in solid blue, so it shows direction without an arrow.
Track and texture. Lanes wraps lane lines round the route like a track bend. Road draws two edge lines and a dashed centre. Made of the ground fills the line with a magnified piece of the ground in your own photo, lit like a raised strip. Perforation punches a hole every hundred metres, like a ticket.
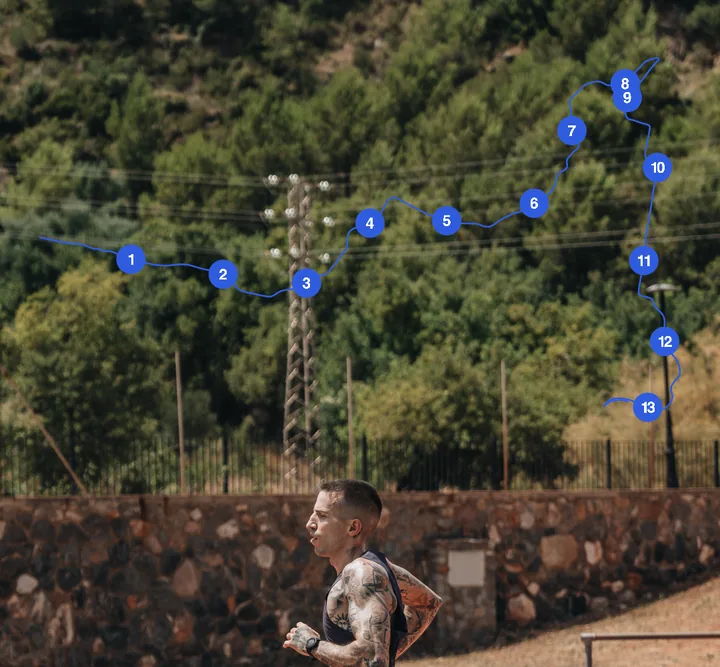
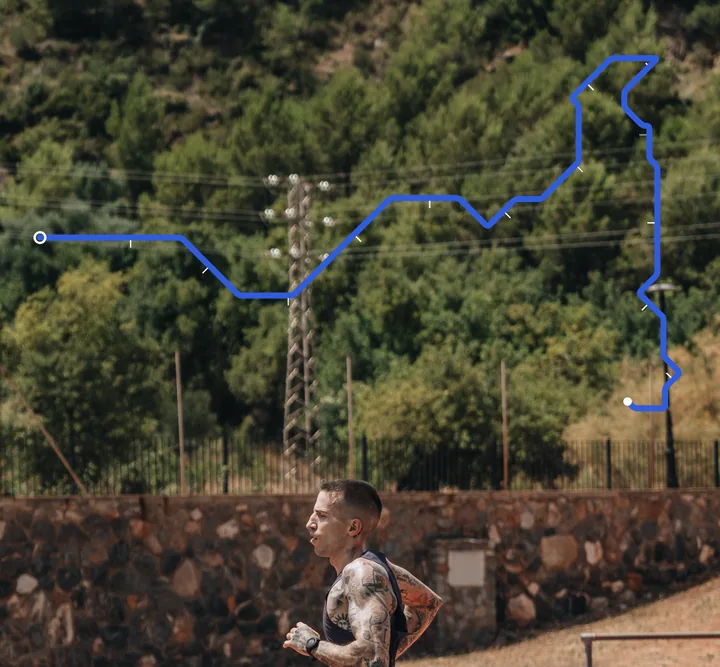
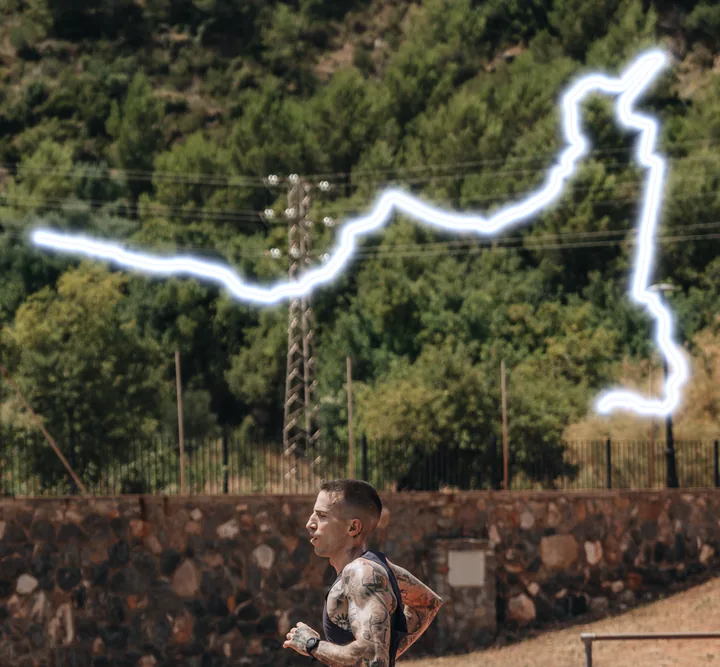
The renders above come from SHUTT's route engine, the same shaders the app uses, drawn on a sample route rather than one of your runs.
Which route styles are Pro?
Five of the 49 carry a small lock on their tile. They are spread through the rail rather than grouped at the end:
| Style | What it does |
|---|---|
| Mirror chrome | A polished tube that reflects the photo around it |
| Neon | A blue gas tube with a pale core |
| Halftone | A dot screen sized by pace |
| Stadium board | The route snapped to a grid of lit squares |
| Blue film | A holographic shimmer that runs navy to blue to white |
Like the Pro looks, they are fully usable while you edit. SHUTT asks for Pro only when you save, and only if the route is actually on the photo. Turn the route off and a Pro style left selected costs nothing.
How to do it in SHUTT
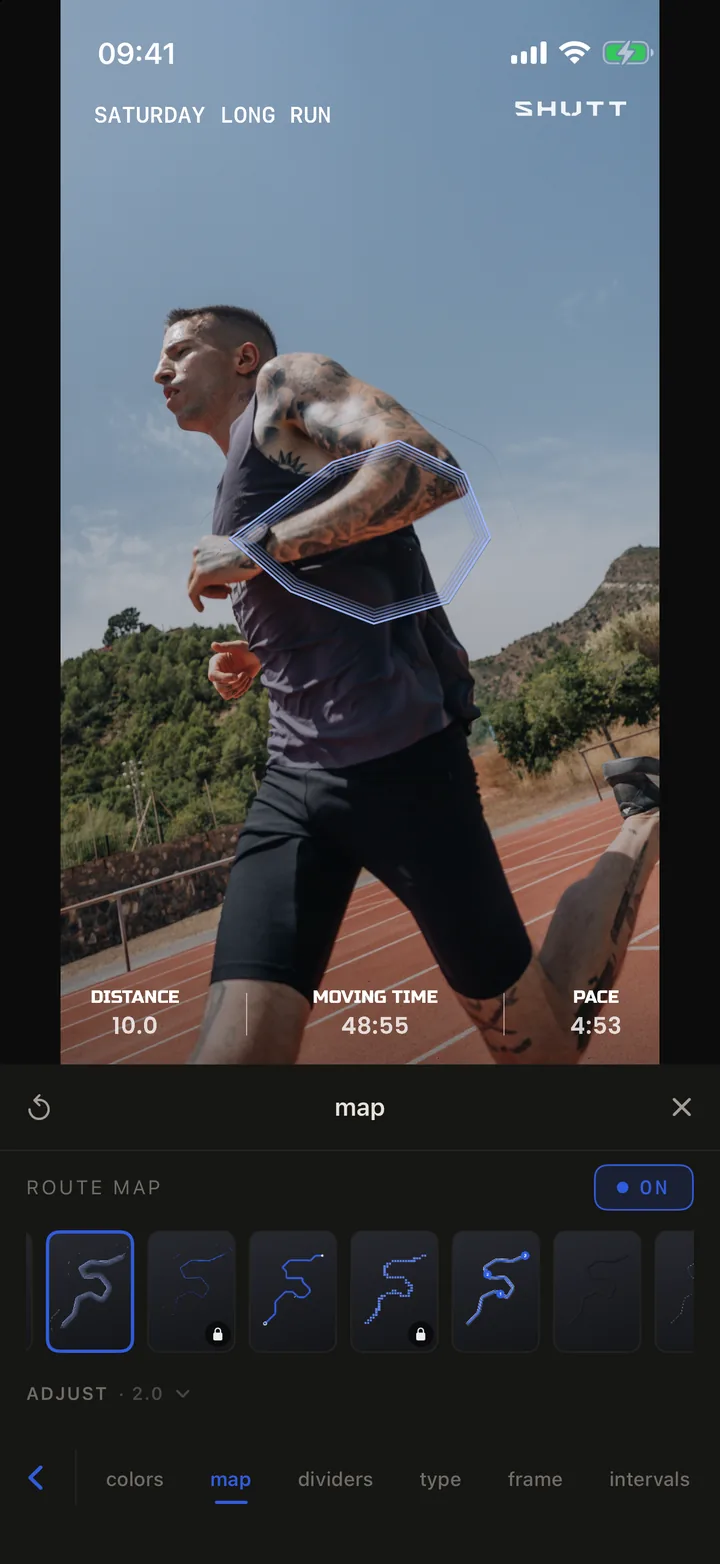
- Open a run and a photo in the editor tab.
- Tap the pencil, then the map tab.
- Switch the route on. If it is off, tap ADD ROUTE; the panel then shows ROUTE MAP as ON.
- Swipe the style rail. The first tile is the plain line; tap any tile to draw that style on your photo.
- Open ADJUST for the finer controls:
- the full frame chip, which stretches the route across the whole photo;
- the line's character: as recorded, smoothed, faceted or schematic;
- the route thickness slider;
- Stats placement: Auto, Inside, Beside or Below the route;
- Laps: All or One, offered only on a route that laps, such as a track session.
- On the plain line you also get start and finish markers, a route outline slider and Color by: Solid, Pace, Elev or HR.
- Drag and pinch the route on the photo to place it, the same as any other block. With the route selected, the style button on its toolbar steps through the same rail without opening the panel.
Choosing a style for a photo
The photo should pick the style, not the other way round.
- Busy photo, lots of foliage or crowd: a thin line, Hollow or Satin chrome. They read without adding noise.
- Dark or night photo: a light style. Neon, Night light, Cast light and Firefly stack all glow against shadow.
- Bright sky or white wall: a solid, saturated style like Metro or Enamel, or Shadow only, which uses the bright ground as its paper.
- A race where the kilometres mattered: Numbered pearls or Split ticks, which put the distance on the line itself.
- A route that is a recognisable shape: keep it simple and large. The shape is the story.
You can start from any look that shows the route and change its style afterwards. The guide to SHUTT's looks explains how looks work. For printing a route large, the race poster guide covers the poster side, and how to make Strava photos look good covers the photo itself. The features page lists everything else.